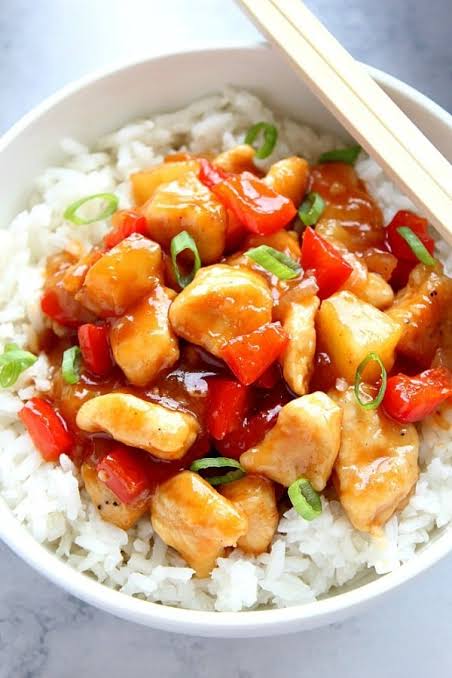
Ever crave that perfect sweet and sour chicken from your favorite Chinese restaurant? You know the one – crispy golden chicken pieces coated in that glossy, tangy-sweet sauce. Good news! You can make this beloved dish right in your own kitchen.
This sweet and sour chicken recipe is easier than you think. No complicated techniques or hard-to-find ingredients. Just simple steps that lead to amazing results.
Prep Time: 20 minutes
Cook Time: 25 minutes
Total Time: 45 minutes
Serving Size: 4 servings
Why You’ll Love This Sweet and Sour Chicken
This isn’t just another chicken recipe. It’s a crowd-pleaser that works for busy weeknights and special dinners alike.
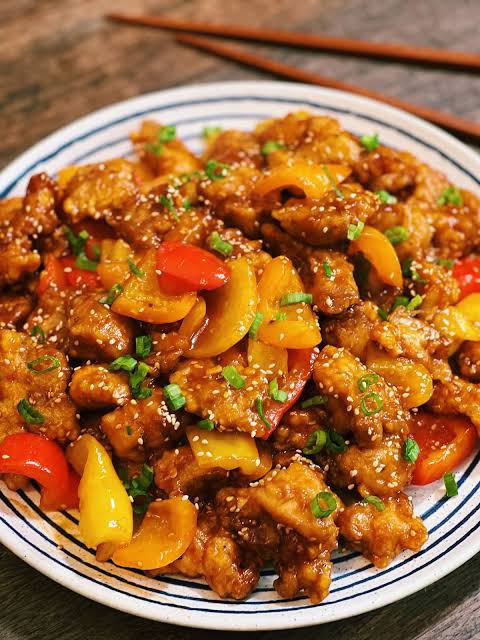
The chicken comes out incredibly crispy. The sauce is perfectly balanced between sweet and tangy. And everything comes together in less than an hour.
Your family will think you ordered takeout. But you’ll know you made something even better.
Ingredients for Sweet and Sour Chicken
For the Chicken:
- 1.5 pounds boneless, skinless chicken breasts, cut into 1-inch cubes
- 1/2 cup cornstarch
- 2 eggs, beaten
- 1/4 cup all-purpose flour
- 1 teaspoon salt
- 1/2 teaspoon black pepper
- Vegetable oil for frying
For the Sweet and Sour Sauce:
- 3/4 cup pineapple juice
- 1/3 cup rice vinegar
- 1/3 cup brown sugar
- 3 tablespoons ketchup
- 2 tablespoons soy sauce
- 1 tablespoon cornstarch mixed with 2 tablespoons water
- 1 teaspoon sesame oil
For the Vegetables:
- 1 red bell pepper, cut into chunks
- 1 green bell pepper, cut into chunks
- 1 cup pineapple chunks (fresh or canned)
- 1 medium onion, cut into chunks
- 2 cloves garlic, minced
- 1 teaspoon fresh ginger, grated
How to Make Sweet and Sour Chicken
Step 1: Prepare the Chicken
Start by patting your chicken pieces dry with paper towels. This step is crucial for getting that crispy coating.
In a bowl, mix the cornstarch, flour, salt, and pepper. In another bowl, beat the eggs.
Dip each chicken piece in the egg first. Then coat it thoroughly in the cornstarch mixture. Make sure every piece is well covered.
Set the coated chicken aside on a plate. Let it rest for 5 minutes. This helps the coating stick better during frying.
Step 2: Fry the Chicken
Heat about 2 inches of vegetable oil in a deep pan or wok. The oil should reach 350°F.
Test the oil by dropping in a small piece of the coating. It should sizzle immediately.
Carefully add the chicken pieces in batches. Don’t overcrowd the pan. This keeps the oil temperature steady.
Fry each batch for 4-5 minutes. The chicken should turn golden brown and crispy.
Remove the chicken with a slotted spoon. Place it on paper towels to drain excess oil.
Step 3: Make the Sweet and Sour Sauce
While the chicken rests, let’s make that amazing sauce.
In a medium saucepan, combine the pineapple juice, rice vinegar, brown sugar, ketchup, and soy sauce.
Bring the mixture to a simmer over medium heat. Stir occasionally to dissolve the sugar completely.
Add the cornstarch slurry (cornstarch mixed with water). Stir constantly as the sauce thickens. This takes about 2-3 minutes.
The sauce should coat the back of a spoon when it’s ready. Remove from heat and stir in the sesame oil.
Step 4: Cook the Vegetables
Heat 2 tablespoons of oil in a large wok or skillet over high heat.
Add the garlic and ginger. Stir-fry for 30 seconds until fragrant.
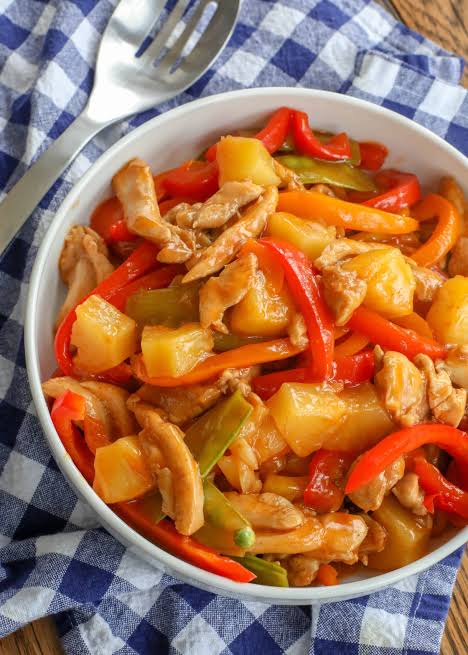
Toss in the bell peppers and onion. Stir-fry for 3-4 minutes. The vegetables should be tender-crisp, not mushy.
Add the pineapple chunks. Cook for another minute.
Step 5: Bring It All Together
Pour the sweet and sour sauce over the vegetables. Stir everything together.
Add the crispy chicken pieces. Toss gently to coat everything in that beautiful sauce.
Cook for 1-2 minutes, just until the chicken is heated through and well coated.
Tips for the Best Sweet and Sour Chicken
Getting the Crispiest Chicken
The secret to crispy sweet and sour chicken is in the coating technique. Make sure your chicken is completely dry before coating.
Don’t skip the resting time after coating. Those few minutes help the coating adhere better.
Keep your oil at the right temperature. Too hot and the outside burns before the inside cooks. Too cool and you get soggy chicken.
Sauce Consistency Matters
Your sweet and sour sauce should be glossy and thick enough to coat the chicken. But not so thick it becomes gloppy.
If your sauce is too thin, mix a bit more cornstarch with water and add it slowly.
If it’s too thick, thin it out with a splash of pineapple juice.
Vegetable Variations
Feel free to customize the vegetables in your sweet and sour chicken. Try adding:
- Snap peas for extra crunch
- Carrots for sweetness and color
- Baby corn for authentic restaurant style
- Water chestnuts for texture
Just remember to keep vegetables crisp. Nobody likes mushy sweet and sour chicken.
Serving Suggestions
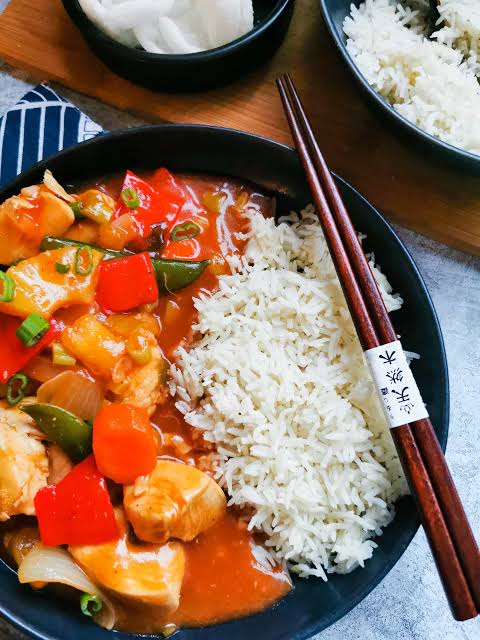
Sweet and sour chicken tastes amazing over steamed white rice. The rice soaks up all that delicious sauce.
Fried rice makes an excellent pairing too. It adds another layer of flavor and texture.
For a healthier option, serve it over cauliflower rice or quinoa.
Add a side of steamed broccoli or stir-fried green beans. These complement the sweet and tangy flavors perfectly.
Storage and Reheating
Store leftover sweet and sour chicken in an airtight container in the refrigerator. It will keep for up to 3 days.
For best results, store the sauce separately from the chicken. This keeps the coating from getting soggy.
To reheat, place the chicken on a baking sheet. Heat in a 350°F oven for 10-12 minutes. This helps restore some crispiness.
Warm the sauce separately in a small pan. Toss everything together right before serving.
Common Mistakes to Avoid
Overcrowding the Pan
When frying sweet and sour chicken, patience is key. Frying too much chicken at once lowers the oil temperature.
This results in greasy, soggy chicken instead of crispy perfection. Work in small batches.
Using Cold Chicken
Room temperature chicken cooks more evenly than cold chicken straight from the fridge. Let your chicken sit out for 15 minutes before cooking.
Adding Sauce Too Early
Don’t add the sauce until you’re ready to serve. The longer crispy chicken sits in sauce, the soggier it becomes.
If making ahead, keep components separate until the last minute.
Nutritional Information (Per Serving)
- Calories: 520
- Protein: 38g
- Carbohydrates: 52g
- Fat: 18g
- Fiber: 3g
- Sugar: 28g
- Sodium: 680mg
Note: Nutritional values are approximate and may vary based on specific ingredients used.
Why This Sweet and Sour Chicken Works
This recipe balances flavors perfectly. The tangy vinegar cuts through the sweetness. The soy sauce adds depth and umami.
The crispy coating provides textural contrast to the tender chicken. Each bite offers something different.
The vegetables add freshness and crunch. They prevent the dish from feeling too heavy.
Making It Your Own
Once you’ve mastered this basic sweet and sour chicken recipe, feel free to experiment.
Try adding red pepper flakes for a spicy kick. Use honey instead of brown sugar for different sweetness.
Add cashews or sesame seeds for extra crunch. Substitute chicken thighs for juicier meat.
The beauty of homemade sweet and sour chicken is that you control everything. Make it exactly how you like it.
Final Thoughts
Making restaurant-quality sweet and sour chicken at home is totally achievable. With this recipe, you’ll create a dish that rivals any takeout.
The combination of crispy chicken, tangy-sweet sauce, and colorful vegetables is unbeatable. Your kitchen will smell amazing. Your taste buds will thank you.
So grab your ingredients and get cooking. This sweet and sour chicken recipe is about to become your new favorite dinner.
Ready to impress your family with this delicious meal?
Let’s make it happen tonight!